
How to change thickness when changing line size in Illustrator
hello. It is an urban brush.
Today, I will teach you how to set whether to change the thickness of a shape made with lines when using Illustrator and change its size, or to change only the size while keeping the thickness constant. In general, it is easy to extend a line into a face, but processing a face into a line is relatively complicated, and it is advantageous to leave the part worked with a line as a line for later modifications, so it is left as is, but depending on the settings, the part that has been worked with a line is left as is. When changing the size, the thickness of the line does not change at the same time, which may result in an odd image, so please learn how to use Illustrator and use it according to the situation.
1. The thickness of the line expands as the size changes.
 In the case above, the thickness of the line in the circular shape is 10pt (stroke) at the top. If you increase the size of this shape, it will look like this:
|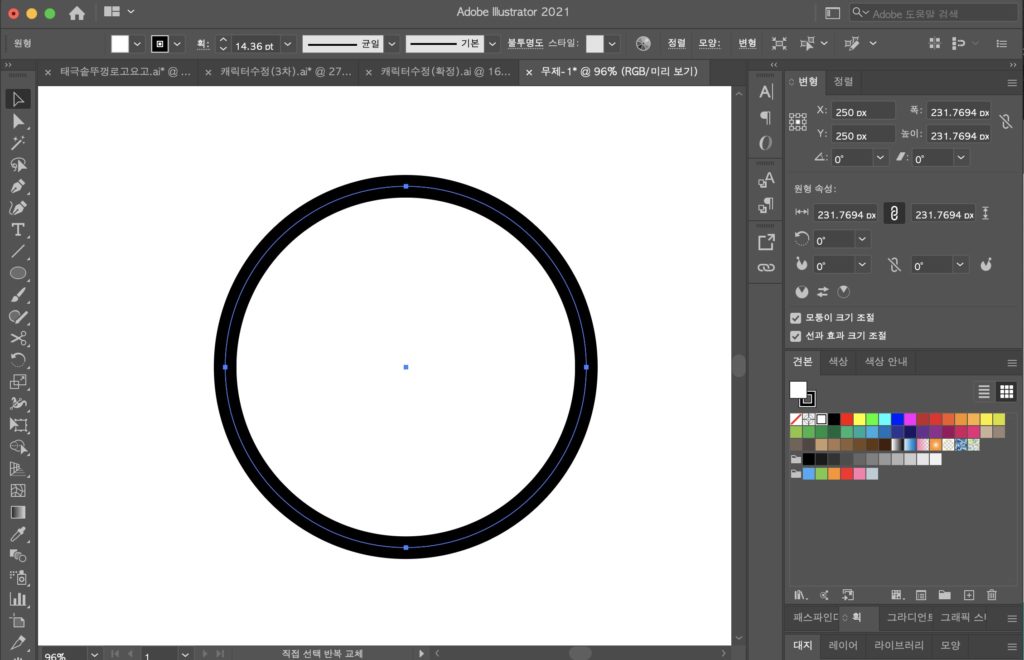 As the shape grows, you can see that the line thickness (stroke) at the top also expands.
2. Even if the size changes, the thickness of the line remains the same.
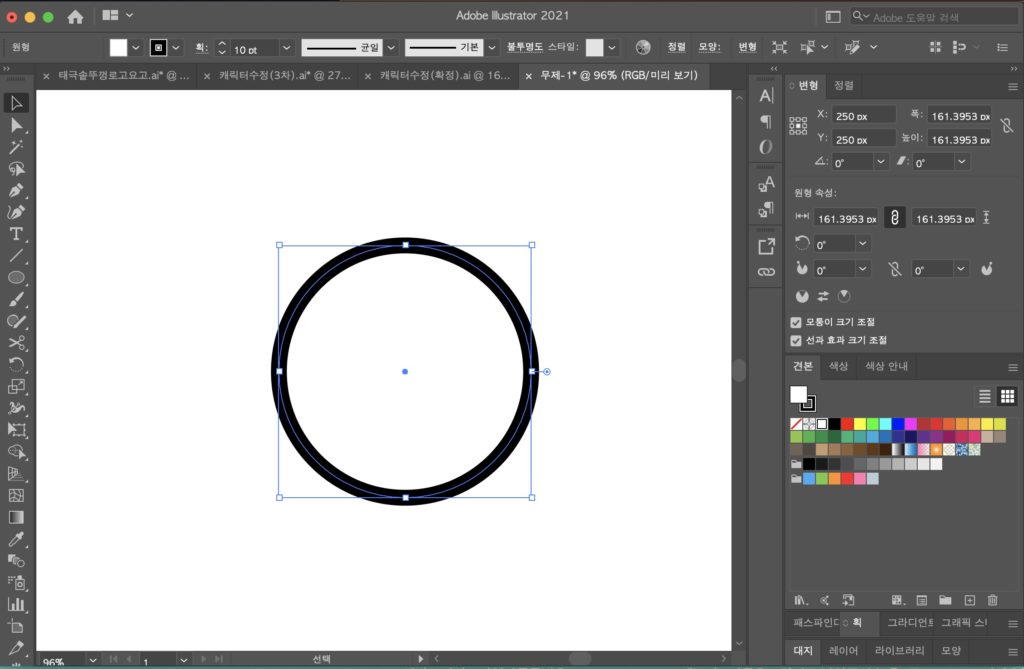
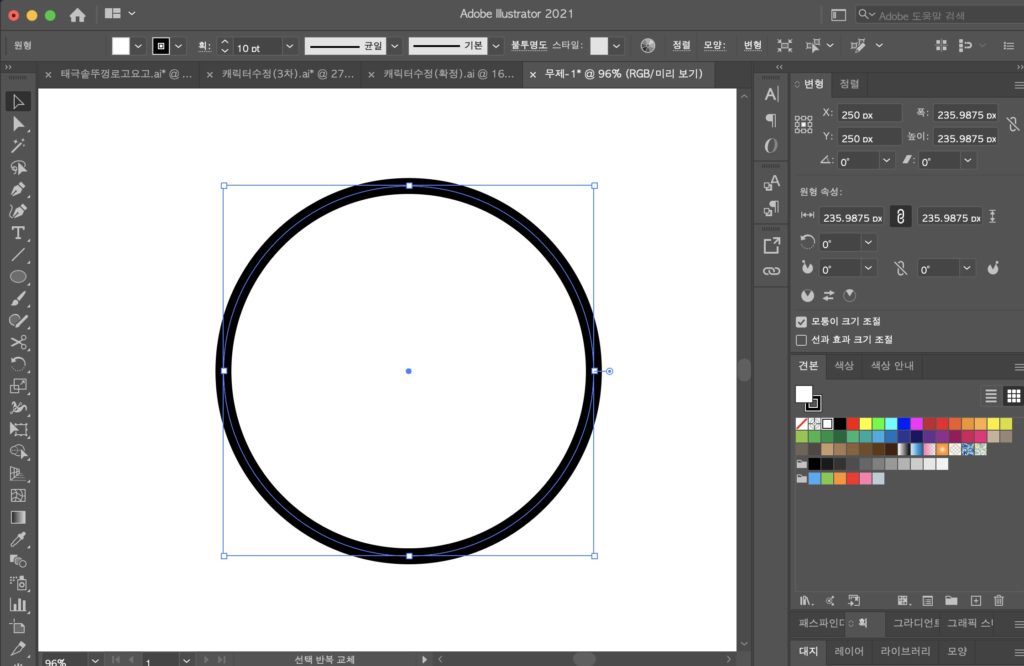 In the case above, even if it is expanded, the thickness (stroke) value of the line at the top remains the same, and only the shape becomes larger.
3. Setting up
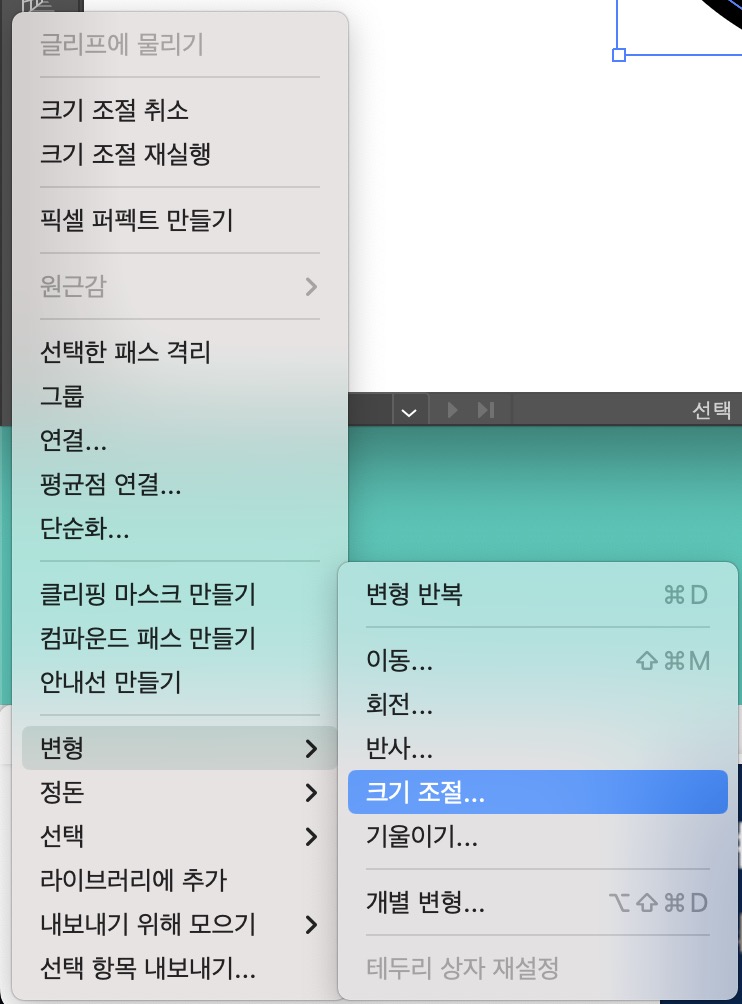 1) First, right-click the mouse and the tools menu will appear. Click ‘Transform’ -> ‘Resize’.
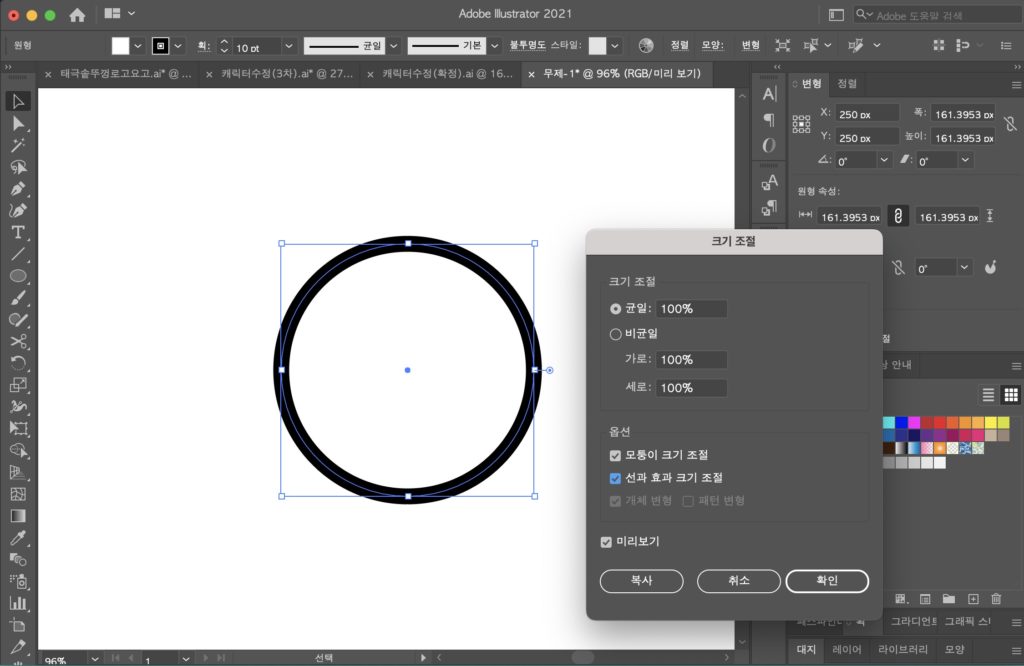 2) In the size adjustment pop-up, set in the menu called ‘Adjust line and effect size’
If you check the 'Adjust line and effect size' checkbox or not, the thickness will increase depending on the size, and when unchecked, the thickness value will remain constant even if you change the size.